Guide 49 · Settings
Muse AI Wallet Settings: Payments Your Agent Can Make
The Wallet holds the payment methods Muse may use for purchases you approve — what it is, how to set it up, and the safety rails around it.
By Abhit T. · Updated October 6, 2026 · 10 min read
Short answer
The Wallet lives under Settings → Wallet in the Muse app and on muse.ai. It holds the payment methods your agent may use for purchases you approve — Link by Stripe and Shop Pay, added via the Add button. Adding a method doesn't hand Muse a blank check: approval gates still pause before anything hard to undo and wait for your confirmation.

What the Wallet is for
Muse is a personal agent, and agents sometimes need to pay for things — booking a ticket, ordering an item, completing a checkout you asked for. The Wallet is where you give it the means: as the screen itself puts it, you “add payment methods to allow Dot to make secure purchases and transactions for you.”
The key word is allow. The Wallet stores the methods; your approval still authorizes each spend. Think of it as putting a card on file with a very careful assistant — one that asks before every single purchase.
How to open Wallet settings
In the Muse app or on muse.ai, open Settings and tap Wallet. It sits in the main settings list between Connectors and Secure credentials store.
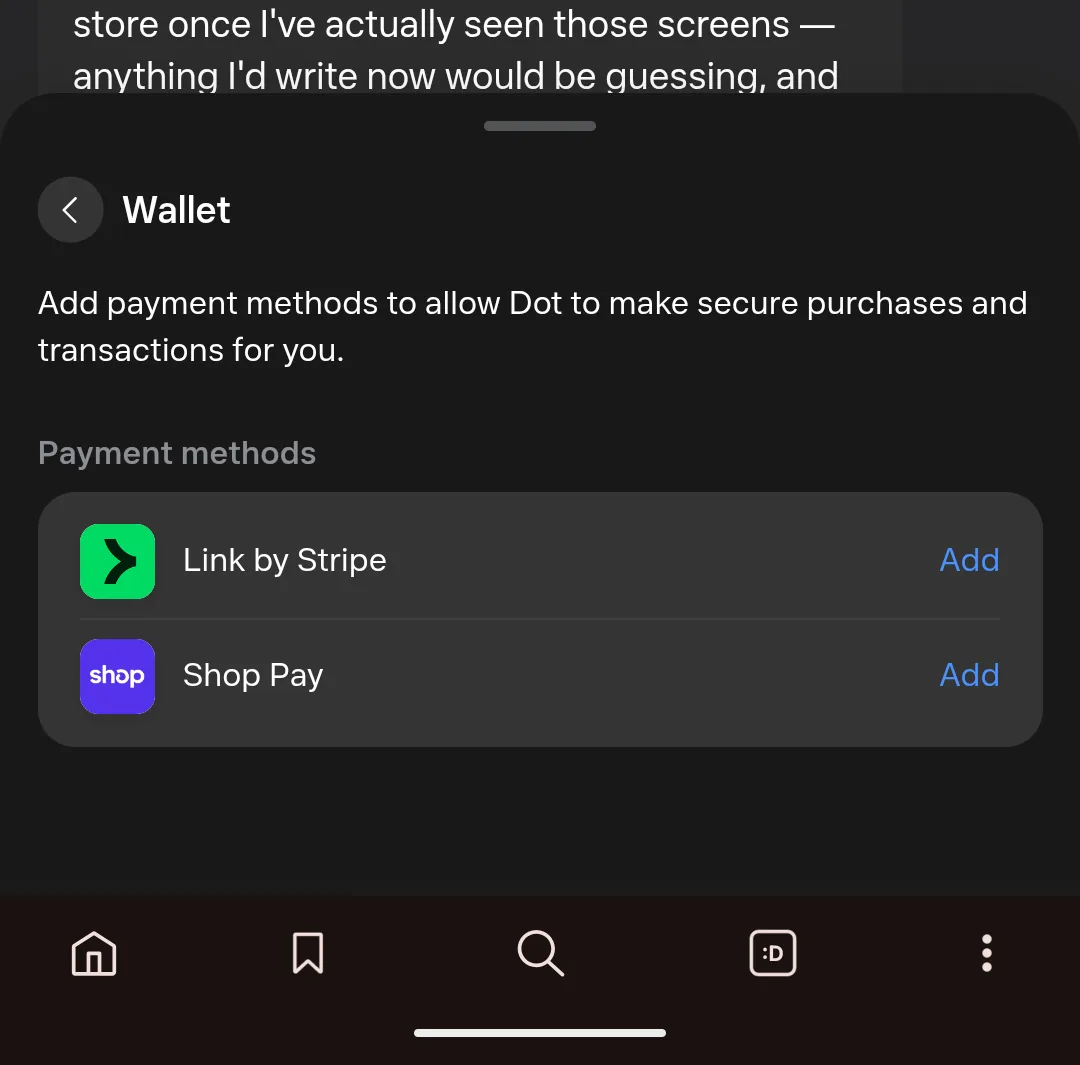
Adding a payment method
As of October 2026, the Wallet offers two payment methods, each with its own Add button:
- Tap Add next to Link by Stripe or Shop Pay — whichever you already use.
- Follow the secure setup prompts to link your method. Card details are entered in the provider's own secure flow, not in a chat.
- Confirm the method appears in your Wallet. You can return to Settings → Wallet any time to review or change your methods.
What happens when Muse wants to buy something
Adding a payment method does not let Muse spend freely. Every consequential action runs through approval gates — structured cards that stop the workflow before anything hard to undo and wait for your confirmation. Making a purchase is explicitly one of the gated actions, alongside sending messages as you or changing settings. Ordinary browsing and research never trigger a gate; anything that moves money does.
In practice: you ask Muse to buy something, it finds the option, and a card appears showing exactly what it plans to spend and where. Nothing is charged until you say yes. The personal-agent guide explains the approval model in more depth.
Wallet safety checklist
- Only add payment methods you're comfortable with an agent using — a dedicated card or account beats your primary one.
- Read every approval card before confirming: check the amount, the merchant, and what you're getting.
- Review your Wallet periodically and remove methods you no longer want available.
- Muse never needs your passwords, one-time codes, or banking logins — if anything asks for those, it's a scam, not Muse.
Wallet questions, answered
What is the Muse Wallet? The screen under Settings → Wallet where you store the payment methods your Muse agent may use for purchases and transactions you approve.
Which payment methods can I add? Link by Stripe and Shop Pay — those are the two options shown in the Wallet screen as of October 2026. Meta may add more over time.
Does adding a payment method let Muse spend freely? No. Approval gates pause before every purchase and wait for your explicit confirmation. The Wallet enables payment; your tap authorizes it.
Where do I manage my payment methods? In the same place: Settings → Wallet, in the Muse app or on muse.ai.
Sources & further reading
- Muse AI Personal Agent — the approval-gate safety model in depth.
- Muse AI Shopping — what Muse can do around shopping tasks.
- Muse AI General Settings — the rest of the Settings screens.
- Muse AI Pricing Explained — Free, Power, and Maximum tiers.